Build a Blog with Rails
Rails New
The website you are on right now is a fairly basic blog written in Ruby on Rails. It allows users to create posts and involves some pretty exciting syntax highlighting and Bootstrap integration. In a series of articles, I will go through, step by step, how to create this very site - from rails new all the way to deployment.
This is designed for someone who is comfortable with code in general, however, I’ll be doing my best to describe what each step does and why we’re doing it. Hopefully, you and I will learn more about the intricacies of a site like this.
First we have to open up Terminal. Navigate to the directory you’d like this project to live in and create a new Rails app. In this case I’ll be going to the Desktop.
cd Desktop
rails new blog
You’ll see everything being created in the terminal. Now, enter the blog directory and start the Rails server.
cd blog
rails s
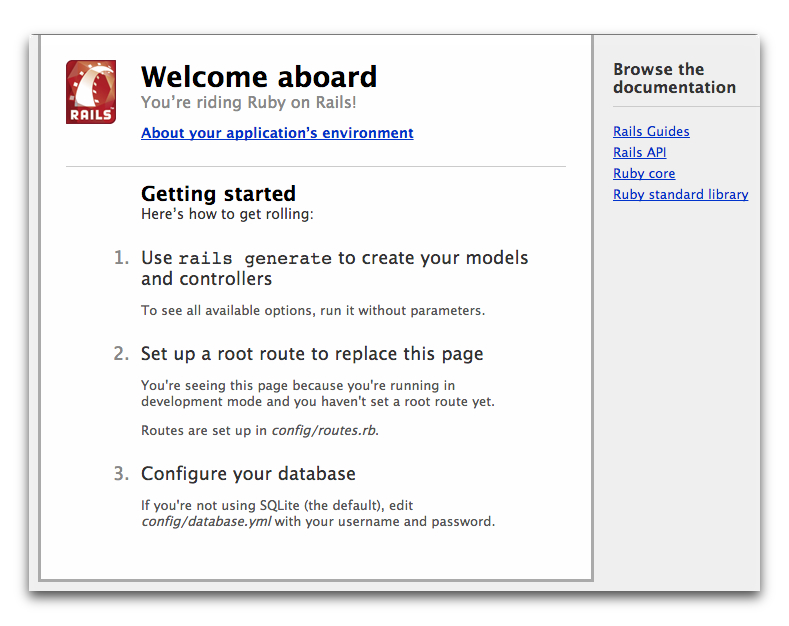
From here, navigate to http://localhost:3000. You should see this screen letting you know everything is running smoothly.
Git Init
Open up your project in your favorite text editor. You should see a whole file tree including app, bin, config, and whatnot. We’re going to touch nearly everything here so be patient. While we’re here, now might be a good time to create our git repository. In your terminal, type:
git init
git status
git add .
git status
git commit -m "Initial commit"
This is going to create the repository. Then, with status we can see all the untracked files in red. Add the entire directory, check the status again, and commit it all with a little message.
From here, we need to add some functionality to our app. First we need to create a controller for our posts.
rails generate controller posts
You’ll see your terminal spit out some stuff after this one. To see what the generate did, navigate to app/controllers/ and you’ll find the posts_controller.rb was born. We’re going to want the posts to be at the root of our site and we need there to be some functionality to create a new post. The first step for this is to give it the index and the new actions. Here’s your posts_controller:
class PostsController < ApplicationController
	def index
	end

	def new
	end
end
Going to the routes file (config/routes.rb). We can start by deleting all the comments in this file. It’s very cluttered and can be daunting. At this point, you should be left with only two lines. Inside, you’re going to add some routes. We need a route for our posts, and we also want that posts page to be our root. At the end, your routes.rb should look like this:
Rails.application.routes.draw do
	resources :posts
	root "posts#index"
end
At this point, if you refresh your browser (be sure your server is still running [rails s]) you’ll find an error telling you you’re missing a template. To fix this, head over to app/views/posts/ and add a new file called index.html.erb. In this file, feel free to add some dummy HTML and just make sure it shows up in your browser. We also have the new action to worry about. Create another file inside app/views/posts/ called new.html.erb. Now, if we navigate to http://localhost:3000/posts/new, we’ll get that file. In your new.html.erb file, we’ll need a form to actually let the user create a post with. It’ll look like this.
<%= form_for :post, url: posts_path do |f| %>
    <p>
        <%= f.label :title %><br>
        <%= f.text_field :title %>
    </p>

    <p>
        <%= f.label :body %><br>
        <%= f.text_area :body %>
    </p>

    <p>
        <%= f.submit %>
    </p>

<% end %>
Rake
Navigate to localhost:3000/posts/new and enjoy the view of the wonderfully boring form you just created. Now, if you hit submit on this page, your data isn’t going to really go anywhere. The next step is to generate a model. Head over to your terminal and repeat after me:
rails g model Post title:string body:text
rake db:migrate
You should see under db/migrate and app/models the newest files just created. In posts_controller.rb we’re going to create our create method and our private method to permit the parameters. We’re also going to add the show method for when we want to display an individual post. posts_controller.rb will look like this:
class PostsController < ApplicationController
    def index
    end

    def new
    end

    def create
        @post = Post.new(post_params)
        @post.save

        redirect_to @post
    end

     def show
        @post = Post.find(params[:id])
    end

    private
        def post_params
            params.require(:post).permit(:title, :body)
        end
end
Show
Before we create a post, we have to create the show page. Again, under app/views/posts, create a new file called show.html.erb. Here, we’re going to want to display the title and body of our posts. Also, I threw in some interesting code to get the date of the post to show up as well.
<h1><%= @post.title %></h1>

<p>Submitted <%= time_ago_in_words(@post.created_at) %> ago</p>
<p><%= @post.body %></p>
If you go to localhost:3000/posts/new, create your post, and navigate to localhost:3000/posts/1, you should see your first ever blog post. The final step for now is to be sure we can access all the posts currently in our database. In posts_controller.rb, inside the index action add
@posts = Post.all.order(‘created_at DESC’)
Then, in index.html.erb we need to create a loop to display all our posts.
<% @posts.each do |post| %>
    <div>
        <h2><%= link_to post.title, post %></h2>
        <p><%= post.created_at.strftime("%B, %d, %Y") %></p>
    </div>
<% end %>
Go ahead and commit have you have with git.
Styling
Our app has very little functionality - which is good. At least it has some functionality. Before we continue, though, I think we should add some styling so we’re not looking at any gross basic HTML structuring. The first thing we’re going to do here is add Bootstrap. In your terminal, create a new branch. This way, if we screw something up, we can always revert back to where we are now and start breathing at a normal rate again.
git co -b style
Here, co is checkout, -b is a shortcut to switch directly to that branch, and style is the name of the branch. Now if you enter git branch, you’ll see the master branch, and that we’re on the style branch. Now since we’re safe, let’s get stylish. In your Gemfile, near the middle, before the group :development, :test do, add:
#bootstrap
gem 'therubyracer'
gem 'less-rails'
gem 'twitter-bootstrap-rails', '~> 3.2.1.rc1'
You can follow along with how I went about this in the Twitter Bootstrap Rails github repo, by the way. Now give your terminal a little rails g bootstrap:install less; this will install the proper stylesheets and whatnot. Then, rails g bootstrap:layout will create the application.html.erb. It’ll probably ask you if you’re sure you want to overwrite your current file, just confirm that you do. Now if you reload your browser you’ll see a much more pleasing site - still showing our posts, and now with a sidebar as well. For the site you’re currently viewing, I got rid of the sidebar. I’m sure you can figure out how to cut that out, if not, here’s the snippet to delete. You can even play around with some of Bootstrap’s features and make an even cooler sidebar.
<div class="col-lg-3">
  <div class="well sidebar-nav">
    <h3>Sidebar</h3>
    <ul class="nav nav-list">
      <li class="nav-header">Sidebar</li>
      <li><%= link_to "Link1", "/path1"  %></li>
      <li><%= link_to "Link2", "/path2"  %></li>
      <li><%= link_to "Link3", "/path3"  %></li>
    </ul>
  </div><!--/.well -->
</div><!--/span-->
Navbar
For the sake of making what we have a little more presentable and to give us some instant gratification we’re going to add some Bootstrap markup to this. Right now, we see Bootstrap generated a nice nav bar for us. It’s cute, but it’s not what I have here, and we’re building this very site. To achieve the transparent nav with links floating on the right while maintaining a nice dropdown toggle for mobile I had to do a few things. First fix your navbar-brand, because that’s probably not how you want that displayed. I did it like this:
<h1><%= link_to "Nick Calabro", root_path, class: "navbar-brand" %></h1>
This way, we’re able to put it in an h1 tag, and it’s also still a link with the bootstrap class navbar-brand that keeps it in place. There are also some divs we want to throw in there, and we’re going to do some magic to get links to active or not if you’re on the corresponding page. When it’s all said and done, it’ll look like this.
<div class="navbar">
  <div class="container">
    <div class="navbar-header page-scroll">
      <button type="button" class="navbar-toggle" data-toggle="collapse" data-target=".navbar-responsive-collapse">
        <span class="icon-bar"></span>
        <span class="icon-bar"></span>
        <span class="icon-bar"></span>
      </button>
      <h1><%= link_to "Nick Calabro", root_path, class: "navbar-brand" %></h1>
    </div>
    <div class="navbar-collapse collapse navbar-responsive-collapse">
      <ul class="nav navbar-nav navbar-right">
        <li class="<%= 'active' if current_page?(root_path) %>"><%= link_to "Articles", root_path  %></li>
      </ul>
    </div>
  </div>
</div>
In your ul, we’re embedding some ruby to only add the active class if the current page is that li’s path. Pretty cool, if you ask me - right, you didn’t ask me. Another way we could’ve done this looks something like this <li class="<%= 'active' if params[:controller] == 'root' %>"><%= link_to “Articles", root_path %></li>. On to terminal.
git add status
git add .
git commit -m “Add Bootstrap"

git co master
git merge style
git branch -d style
Now that you have something that looks pretty, we can commit these changes, merge them, delete the style branch and add some crazy functionality next.
Validate
Right now, you can create a post with absolutely no content inside. In your app/models/post.rb file, we’re going to want to add some validations.
class Post < ActiveRecord::Base
    validates :title, presence: true, length: { miniimum: 5 }
    validates :body, presence: true
end
It’ll look like this when you’re finished. It can be kind of self-explanatory, but all we’re doing it telling it to throw an error if the title isn’t present at all or has fewer than 5 characters. Same thing with the body minus the char count.
Next, we have to add some functionality to posts_controller.rb. In the new method add @post = Post.new. We’re also going to change up the create method by adding a little conditional. It should look like this.
def create
    @post = Post.new(post_params)

    if @post.save
        redirect_to @post
    else
        render 'new'
    end
end
Errors
Now, if you try to make a post at localhost:3000/posts/new and your title is not at least five characters, you won’t be able to post it. But, this isn’t very intuitive. Sure, you know about that rule now, but you might forget. A simple error message can really come in handy. So, near the form in new.html.erb add this right under the form_for and right before the first <p> tag:
<% if @post.errors.any? %>
    <div id="error">
        <h2><%= pluralize(@post.errors.count, "error") %> prevented this post from saving</h2>
        <ul>
            <% @post.errors.full_messages.each do |msg| %>
                <li><%= msg %></li>
            <% end %>
        </ul>
    </div>
<% end %>
Partial
While we’re here, cut everything from this file except the h1 tag on top and create a new file in the same directory called _form.html.erb. This is a special type of file called a partial that’ll allow you to throw snippets like the form into. These types of coding practices will help keep our programs more DRY. Paste the whole form in there and just change the first line from <%= form_for :post, url: posts_path do |f| %> to <%= form_for @post do |f| %> - this will ensure our form is dynamic enough to be passed around the application. Now in new.html.erb just add <%= render ‘form’ %>. Go ahead and test out a new post to find nothing has changed on the front end.
I’m sure you know how to commit your work with git at this point.
Edit/Update
Let’s face it, you’re never going to write a whole post the right way on the first try. Hell, this post probably has so many typos I’m surprised you’re still reading it. Adding update and edit functionality is fairly easy in our Rails app. Here’s the extra code you’ll need in the posts_controller.rb:
def edit
    @post = Post.find(params[:id])
end

def update
    @post = Post.find(params[:id])

    if @post.update(params[:post].permit(:title, :body))
        redirect_to @post
    else
        render 'edit'
    end
end

 def destroy
    @post = Post.find(params[:id])
    @post.destroy

    redirect_to root_path
end
From here, we now need a new view for the editing page. In /posts, create a new file called edit.html.erb. We can actually take the same code we have in new.html.erb and simply copy/paste it - just be sure to change the h1 tag from “New Post” to “Edit Post”.
This is great. We have all this functionality, but there are no links to get to any of them, and who wants to type things into the address bar? In show.html.erb, somewhere near where we show the date of the post, go ahead and add these couple lines of code:
<%= link_to 'Edit', edit_post_path(@post) %>
| <%= link_to 'Delete', post_path(@post), method: :delete, data: { confirm: "You sure?" } %>
With that, we now have all the CRUD features for our blog. Create, read, update, and destroy all the blog posts you’d like. We’re still not quite finished, though, but we’re nearly there.
Users
Right now, anyone can come into your application and start deleting your posts - or worse, they can make their own posts. Our application is great and all, but it has no idea who you are. We’re going to fix that right now with Devise. First step for this is to add the gem to our Gemfile. We did this before while adding Bootstrap. Simply append gem 'devise', '~> 3.4.0' and run bundle install. Restart your server and run rails g devise:install. This will prompt some instructions for you. Step five should be to install the Devise views, we’ll do that by running rails g devise:views.
Now, run rails g devise User, rake db:migrate and navigate to localhost:3000/users/sign_up you should be able to sign up. The only thing left to do is still make sure that not just anyone can mess around with your posts. In posts_controller.rb, right on the second line add this line of code provided by Devise, before_action :authentication_user!, except: [:index, :show].
All that is left is to make sure you have to be signed in to access the edit and delete links. This one’s easy, in show.html.erb, wrap the edit and delete links in <% if user_signed_in? %> and <% end %>. Commit all of this.
Heroku Create
Deploying your app can be the hardest part. I went through many different attempts to try and get this app running as smooth as I can, since I wasn’t prepared to handle sysadmin stuff at this point in time, I ended up making it a separate little app on Heroku instead.
Heroku makes things so effortless anyone can have an app running on the live web in a matter of minutes. There are a couple tiny adjustments we have to make in our app first. Heroku and SQLite don’t play nicely together, it prefers Postgresql. In your Gemfile, comment out the sqlite3 gem and at the bottom of the file add this:
group :production do
    gem 'pg'
end
Be sure to commit this, and bundle install. There, now your app is ready to run on Heroku’s servers. For the next part, just make a free account over at Heroku and follow their instructions for getting the tool belt installed. Once you’ve done that, run heroku create. If you refresh your dashboard on Heroku you’ll see a new app appear. At this point, you can try running heroku open which will load your app live in your browser, however, nothing is really there yet except a little note assuring us everything is okay. We still have to run git push heroku master - this will actually push your app onto the server, it might take a while. Finally, we run a migration through heroku with heroku run rake db:migrate.
heroku open and you should see your site live! Share the link with pride. Go back to your dashboard and connect it with the Github repo so when you push changes Heroku can detect them straight from there.
Now we’re going to get a little hack-y. I’m not sure of the most efficient way to go about this, if I’m doing this totally wrong, well, at least I had a good time. Go to your app users/sign_up and create an account. Don’t forget these credentials and make sure they’re fairly secure. git clone your app again or however you have it set up at the moment and navigate to the app/models/user.rb file and just remove the :registerable tag. This will allow no one to make an account on your blog and start messing with your posts.
Commit it, deploy the latest branch in the Heroku dashboard, and you should be fully set to go.